How to Master the Pour Over Coffee Method at Home
You’ll get a friendly, simple guide to the right gear, how to pick a dripper for your cup, and why a scale and timer matter for repeatable results. You’ll learn how to choose fresh beans, set the best grind, and control water and temperature for balanced extraction. You’ll master the bloom, pouring with a gooseneck kettle, and picking the right filters, plus quick fixes for sour or bitter cups so your brew shines every time. This guide will help you learn How to Master the Pour Over Coffee Method at Home.
Key Takeaway
- Use fresh, medium-fine coffee and grind it right before you brew
- Heat water until it is just off the boil
- Keep your coffee-to-water balance consistent for steady taste
- Pour slowly in a steady spiral and let the grounds bloom first
- Keep your equipment clean and take your time for a clear cup
How to Master the Pour Over Coffee Method at Home with the right gear
Pour over is a simple ritual that puts you in charge of taste. With the right gear, you shape strength, clarity, and aroma by changing just a few things: grind, pour speed, and water temperature. Small moves make big swings in flavor — that’s the fun and the challenge.
Start by picking gear that matches how you like your coffee. A dripper with a fast flow makes a brighter cup; a slower flow gives more body. A gooseneck kettle gives control when you pour. A scale and timer let you repeat the good days and learn from the not-so-good ones. For deeper, authoritative guides on choosing drippers, kettles and scales, see Guides to coffee brewing gear and technique.
Practice like a craftsman, enjoy it like a hobby. Keep a simple log: coffee dose, grind size, water temp, and pour times. After a few brews you’ll see patterns. Little experiments, one cup at a time, are the heart of how to master the pour over coffee method at home.
Choose a dripper that fits how you brew and your cup size
Your dripper controls flow and contact time. Conical drippers (V-shaped) channel water to the center and usually need a finer grind. Flat-bottom drippers hold water longer and can give a more even extraction with a medium grind. Material matters: ceramic keeps heat steady, metal cools faster but is light, and glass looks nice on your counter.
Size matters too. Smaller drippers are great for one cup; larger ones work better for two or more. Match the dripper to how many cups you brew and the taste you want.
| Dripper type | Flow rate | Best grind | Best for |
|---|---|---|---|
| Conical (e.g., V60) | Fast to medium | Fine–medium | Bright, single cups |
| Flat-bottom (e.g., Kalita Wave) | Medium | Medium | Even extraction, multi-cup |
| Wave/Flat with ridges | Steady | Medium | Consistent taste, less fuss |
| Ceramic or glass | Varies | Varies | Heat retention, clean flavor |
Tip: If you switch drippers, keep the same recipe and only change grind size. Small tweaks will get you back to a cup you love.
Use a scale and timer so you can repeat good results
A scale takes the guesswork out of dosing. Weigh both your coffee and water. A common starting ratio is 1:15 to 1:17 coffee to water. For one 12 oz cup, try about 20 g coffee to 300–340 g water, then tweak to taste.
A timer keeps pours consistent. Note bloom time, total brew time, and pour pace. If your brew runs too fast, use a finer grind; if it drags, go coarser. With scale and timer you turn luck into repeatable wins.
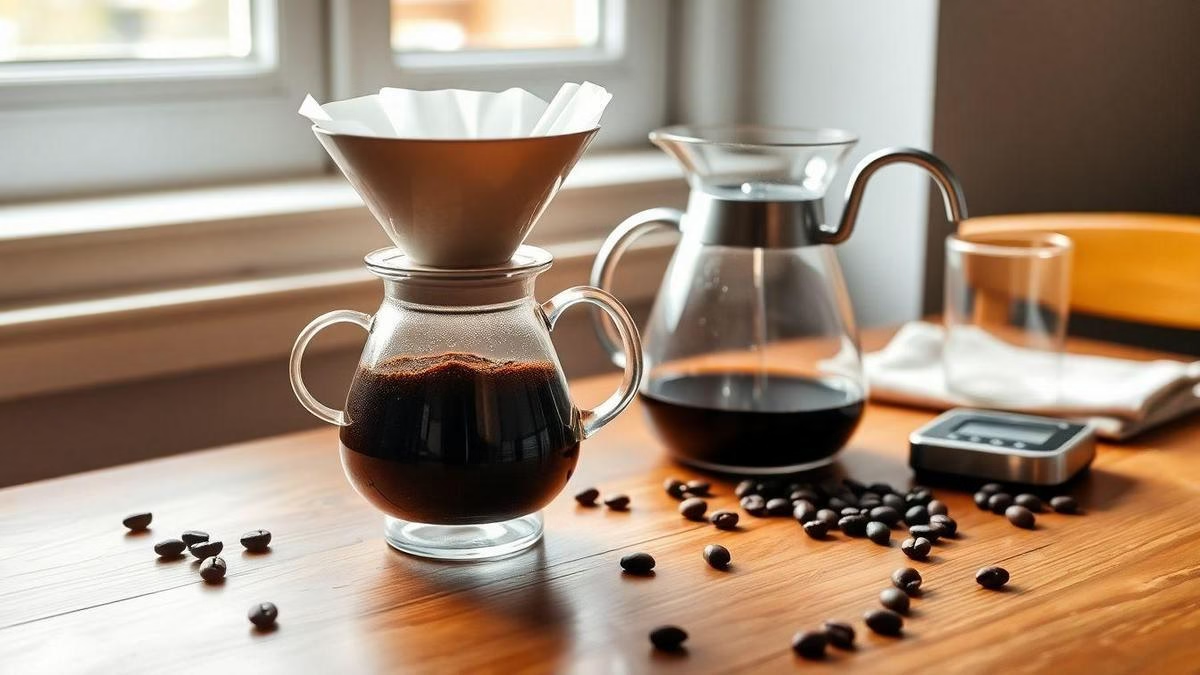
Essential accessories: dripper, gooseneck kettle, scale, filters
These four items are the backbone of pour over. The dripper shapes flow, the gooseneck kettle lets you pour slow and steady, the scale gives exact dosing, and the right paper or metal filter affects clarity and oils. Together they make repeatable cups and let you focus on small tweaks that move flavor.
Choose beans, roast level, and the best grind size for pour over coffee
You want a clean, bright cup with good aroma. Pick beans that match the flavor you love: fruity and floral for light roasts, chocolate and nutty notes for medium roasts, or deeper caramel and spice from darker roasts. How to Master the Pour Over Coffee Method at Home starts with choosing beans that speak to your taste. For practical advice on selecting and storing beans, read How to choose and store coffee beans.
Roast level shapes the whole brew. Light roasts keep more origin flavors and acids; medium roasts are balanced and forgiving; dark roasts are bold but can hide subtle notes. Plan grind and dose around the roast you choose.
Grind size controls how fast water moves and what flavors come out. Too coarse tastes weak; too fine tastes bitter. For pour over, aim for clarity and control. Small changes in grind will change the cup more than changing beans or roast, so tweak one thing at a time.
Pick fresh whole beans and grind just before brewing for flavor
Buy whole beans roasted within the last three weeks and grind just before brewing. The oils and aromas bloom in seconds. Store beans in a cool, dry spot away from light and strong smells. Use an airtight jar and keep only what you will use in a week or two; if you buy in bulk, split and freeze unopened portions.
Tip: Weigh your beans and water. Use a scale and a simple ratio to repeat good results.
Set a medium‑fine grind and tweak it to balance taste
Start at medium-fine and taste. If the coffee tastes sour or under-extracted, make the grind a hair finer. If it tastes bitter or harsh, make it a bit coarser.
Adjust in small steps — one click on a grinder or about 100 microns by hand if you can. Keep brew time and water temperature steady while you change grind so you can hear what the grind is doing.
Freshly ground coffee smells like rain on warm pavement — sharp and alive. Pay attention to that scent. It tells you a lot.
Best grind size for pour over coffee: clarity and consistency
Aim for a grind that looks like coarse table salt. That gives clarity and lets fruity notes sing without muddiness. Consistent particles keep extraction even, so invest in a burr grinder if you can.
| Grind Size | Texture Example | Flavor Result | Use For |
|---|---|---|---|
| Coarse | Sea salt chunks | Under-extracted, weak | Cold brew, French press |
| Medium | Table salt | Balanced, clean | Chemex with thick filter |
| Medium-fine | Fine table salt | Bright, clear, good body | V60, most pour overs |
| Fine | Sugar or flour | Over-extracted, bitter | Espresso, not pour over |
Control water: ideal water temperature for pour over and ratios
You control flavor by controlling the water. Temperature and the amount you pour shape acidity, sweetness, and body. Aim for consistency: heat to the right range and measure your water and coffee with a scale and timer to get repeatable results.
Small changes make big differences. Raising temperature brings out more sweetness and body; lowering it highlights bright, fruity notes. A heavier brew (more coffee per water) gives a richer cup; a lighter brew feels cleaner and thinner.
If you want a quick guide on How to Master the Pour Over Coffee Method at Home, start with the temp range and a 1:15–1:17 ratio. That pair is a solid starting point and will let you hear the bloom, watch the flow, and taste differences as you tweak variables. For clear, practical advice on brewing temperatures and ratios, see Practical brewing ratios and temperature guidance.
Heat water to 195–205°F (90–96°C) for balanced extraction
That 195–205°F (90–96°C) band is where most beans sing. At this heat you pull oils and sugars without dragging too many bitter compounds. If you brew in boiling water, you risk over-extraction; at lower temps you might get sourness and weak sweetness. Let a full boil rest 30–45 seconds before pouring if you don’t have a temperature kettle.
Altitude and roast matter: at high altitudes water boils at lower temps; darker roasts often do well at the lower end of the range; lighter roasts can handle the higher end.
Use a coffee-to-water ratio for pour over brewing of about 1:15–1:17
Ratios tell you how strong your brew will be. 1:15 means 1 gram of coffee for every 15 grams of water; 1:17 will be milder. For a single cup try 20 g coffee to 300 g water (1:15) or 18 g to 306 g water (1:17). Scale numbers up or down when making more cups.
Callout: Use a kitchen scale and a timer. Weigh coffee and water every time, and time your pours. Small habits make your brews steady.
| Variable | Typical Range | Quick example |
|---|---|---|
| Water temperature | 195–205°F (90–96°C) | Let boil rest 30–45s |
| Ratio | 1:15–1:17 | 20 g coffee : 300 g water (1:15) |
| Adjust for taste | Hotter = fuller, Cooler = brighter | Move temp ±5°F or ratio ±0.5 |
Learn the pour over coffee technique step by step and bloom time
You’ll get a cleaner, brighter cup when you learn the pour over. Start with fresh beans, a burr grinder, a gooseneck kettle, the right ratio (about 1:15–1:17), and steady hands. Master the small moves first and the flavor will follow.
Set up: weigh your coffee, heat water to about 92–96°C (197–205°F), and rinse the paper filter to remove papery flavors. Grind medium-fine, like table salt. Pouring pace and timing decide a lot. With practice you’ll read the brew like a song — tempo and rests matter. For a concise overview of brewing methods including the bloom and timing, see Overview of pour-over techniques and steps.
Blooming is the first big move. A proper bloom releases trapped CO2 and lets water extract evenly.
If your beans were roasted within the last 3–7 days, use a 40–45 second bloom and slightly coarser grind to avoid over-extraction.
Start with a 30–45 second bloom to release trapped CO2
Pour about twice the weight of your grounds in water to start the bloom. For 15 g of coffee, pour 30–40 g of water in a slow, even stream. Grounds should swell and bubble; that’s CO2 escaping. Wait through the bloom before pouring more.
If the bloom barely bubbles, the coffee may be stale or under-roasted. If it foams wildly, shorten the bloom or coarsen the grind.
Pour slowly in small concentric circles to wet grounds evenly
After the bloom, pour in slow concentric circles from center outward, then back. Keep the stream thin and steady to prevent channeling. Pause between pours to let water draw down a little, then add more. Aim to finish pouring so total brew time lands around 2:30–3:30 minutes for a V60-style pour over. Your wrist is the conductor and the water the orchestra.
Bloom time and step-by-step flow
Bloom 30–45s (twice the coffee weight in water), then pour in 3–4 additions using small concentric circles; total brew time 2:30–3:30. Adjust grind or timing to taste.
| Step | Time (approx) | Action | Water (for 15 g coffee) |
|---|---|---|---|
| Bloom | 30–45 s | Pour 30–40 g slowly, let gas escape | 30–40 g |
| 1st pour | 30–45 s | Add to 60–80 g total, slow circles | 30–40 g |
| 2nd pour | 30–60 s | Add to 120–160 g, steady pour | 60–80 g |
| Final pour | Finish by 2:30–3:30 | Top up to target yield | ~65–105 g |
Choosing filters for pour over coffee and using a gooseneck kettle
Choosing the right filter and using a gooseneck kettle will change your cup more than you think. The filter shapes body and clarity; the kettle shapes extraction. If you search How to Master the Pour Over Coffee Method at Home, start here: the filter affects the mouthfeel and the kettle affects the control.
Paper filters trap oils and give a cleaner cup. Metal leaves more oils and gives a heavier mouthfeel. Cloth keeps some oils and adds texture. Once you taste the differences, match a filter to the roast, grind, and mood.
Try paper for clean cups, metal for body, cloth for oils and texture
Paper is your safety net: bright, clean, crisp cups. Rinse paper before use to avoid papery flavors and warm the dripper.
Metal filters are for rich, full cups — more oils and fines pass through. Cloth sits between paper and metal: it keeps some oils while filtering fines, giving a balanced, silky cup. Cloth needs care — rinse and dry — but rewards with a textured finish.
| Filter type | Flavor notes highlighted | Body | Care notes |
|---|---|---|---|
| Paper | Bright, clean, crisp | Light | Rinse before use; dispose after brewing |
| Metal | Rich, full, robust | Heavy | Wash well; can retain oils if not cleaned |
| Cloth | Smooth, rounded | Medium | Rinse and dry; replace periodically |
Tip: If a coffee tastes thin, try metal or a coarser grind. If it’s muddy, switch to paper and grind finer.
Use a gooseneck kettle to control flow rate and pour placement
A gooseneck kettle gives a narrow, steady stream so you can direct water precisely. Pour placement affects how evenly the bed wets. Pour too fast and you over-extract some parts; too slow and you under-extract others. Start with a slow bloom pour, then pour in small spirals or pulses, keeping the water level steady.
Pour over brewing tips for beginners and troubleshooting extraction
Pour over is simple, but small changes make big differences. Start with fresh beans, a burr grinder, and hot water just off the boil. Use a scale and time your brew. A common starting ratio is 1:16 coffee to water. Focus on one variable at a time: grind, temp, or pour speed.
Watch the coffee bed as you pour. A good bloom (30–45 seconds) shows freshness and lets CO2 escape. If the surface sinks too quickly or channels form, your grind or pouring rhythm needs adjusting. Keep notes; you’ll learn faster when you track what you changed and how the cup tasted.
Troubleshooting is educated experimenting. Taste first, then adjust one thing.
If coffee tastes sour, make the grind finer or raise temperature
Sour coffee usually means under-extraction. Make the grind a bit finer, slow the pour, or raise water to roughly 92–96°C (197–205°F). If brew time is under two minutes, slow down or grind finer.
If it tastes bitter, make the grind coarser or shorten brew time
Bitter coffee usually means over-extraction. Try a coarser grind, shorten brew time, or lower water temperature. Also rinse your filter to remove papery flavors that can add harsh notes.
| Problem | Likely cause | Quick fix |
|---|---|---|
| Sour / bright | Under-extraction (too coarse, too cool, too fast) | Grind finer, raise temp to 92–96°C, slow pour |
| Bitter / harsh | Over-extraction (too fine, too hot, too long) | Grind coarser, shorten brew time, lower temp |
| Thin / weak | Low dose or fast flow | Use correct ratio (1:15–1:17), adjust grind finer |
Simple tips for how to master pour over coffee at home and fix common issues
Start with a set routine: weigh beans, set grind, bloom 30–45 seconds, and use steady circular pours. Keep a notebook of grind size, water temp, ratio, and brew time. Change only one thing at a time. With small steps you’ll learn to read the cup and make quick fixes.
Quick checklist: How to Master the Pour Over Coffee Method at Home
- Fresh whole beans (roast date visible)
- Burr grinder, medium-fine setting (coarse table salt)
- 1:15–1:17 coffee:water ratio (try 20 g : 300 g)
- Water 195–205°F (90–96°C) — let boil rest 30–45s if needed
- Bloom 30–45s (pour twice the weight of grounds)
- Pour in slow concentric circles; finish in ~2:30–3:30 minutes
- Use a gooseneck kettle and rinse paper filters
Conclusion
You’re now stocked with the essentials: fresh beans, a consistent grind, the right water temperature (195–205°F / 90–96°C), and a steady coffee:water ratio (1:15–1:17). Use a scale and timer, start with a 30–45 s bloom, and pour slowly with a gooseneck kettle into the dripper and filter that match the cup you want. Those small moves — done the same way — turn good luck into repeatable magic.
Treat each brew like a tiny experiment. Keep a short log of dose, grind, temp, and brew time. Tweak one thing at a time. Take your time, keep gear clean, and enjoy the process. Keep brewing, keep tasting, and enjoy the win when a cup finally sings. For more tips and guides, read more articles at https://guiabebefeliz.com.

Rafael Souza is a digital marketing specialist and passionate coffee enthusiast. He founded Guiabebefeliz to share practical, easy-to-follow guides for making great coffee at home without needing professional barista skills. His mission is to help readers enjoy better coffee experiences, one cup at a time.


